A solid pressure injury staging guide is the absolute foundation of effective wound care. It’s our shared language, the clinical shorthand we use to classify tissue damage and communicate a patient’s story. But let’s be clear: proper staging is not just about documentation. It's the critical first step that dictates treatment plans, helps predict outcomes, and ensures every clinician on the team is on the same page. Without this fundamental skill, even the most advanced treatments can be misapplied, leading to delayed healing and compromised patient safety. The ability to accurately stage a pressure injury is a non-negotiable competency for any healthcare professional involved in patient care.
Why Accurate Staging Is a Clinical Imperative
Getting pressure injury staging right is far more than an academic box-ticking exercise. It's a fundamental clinical skill that underpins patient safety and successful wound management. This process is not merely about assigning a number; it's about interpreting a complex set of visual and tactile clues that tell a story about the extent of tissue damage.
When you correctly identify a Stage 1 injury versus a Deep Tissue Injury (DTI), you kick off a cascade of the right interventions—from aggressive offloading to specific dressing choices. Get it wrong, and you risk delayed treatment, preventable wound decline, and ultimately, poor patient outcomes. For instance, misidentifying a DTI as a simple bruise could lead to insufficient pressure relief, allowing the underlying tissue to necrose and evolve into a full-thickness wound that was potentially preventable.
Think of staging as the universal language of wound care. It creates a seamless understanding between nurses, physicians, and therapists. This shared vocabulary is essential for tracking a wound's progress (or lack thereof), judging if a care plan is actually working, and making smart, timely adjustments. It ensures that when one clinician documents a "Stage 2 pressure injury on the left heel," every other member of the team visualizes the same level of tissue involvement, enabling consistent and continuous care across shifts and disciplines.
The Evolution of Modern Staging
The system we rely on today has evolved quite a bit to give us more clinical accuracy. The journey started with foundational work back in 1975 and hit a major milestone in 2007 with the inclusion of 'suspected Deep Tissue Injury' (sDTI). This was a huge step, as it finally acknowledged that severe damage could be lurking beneath intact skin, a concept that fundamentally changed early intervention strategies.
The biggest shift, however, came in April 2016. That’s when the term 'pressure ulcer' was officially updated to 'pressure injury' to better reflect damage to both intact and ulcerated skin. At the same time, the stages were simplified to easy-to-understand Arabic numerals (Stage 1-4). This wasn't just a semantic change; it broadened the definition to include injuries like DTIs where the skin surface might not be broken, promoting earlier recognition and intervention. You can explore the history of these important changes and their clinical impact in more detail.

This pressure injury staging guide is built for busy clinicians. We’ve cut through the dense definitions to give you actionable insights you can use to make confident assessments right at the bedside. Our goal is to bridge the gap between textbook knowledge and real-world clinical application.
To help you quickly reference these categories during your assessments, here is a breakdown of the key visual and tissue involvement characteristics for each stage.
Pressure Injury Stages At a Glance
| Stage/Category | Key Visual Indicators | Tissue Involvement | Common Locations |
|---|---|---|---|
| Stage 1 | Non-blanchable erythema of intact skin. | Intact skin. | Bony prominences like the sacrum, heels, hips. |
| Stage 2 | Partial-thickness skin loss with exposed dermis. Pink/red, moist wound bed. | Epidermis and dermis. | Heels, elbows, ischial tuberosities. |
| Stage 3 | Full-thickness skin loss. Adipose (fat) is visible. | Epidermis, dermis, and subcutaneous tissue. | Sacrum, buttocks, trochanters. |
| Stage 4 | Full-thickness skin and tissue loss. Exposed fascia, muscle, tendon, or bone. | All skin layers, extending to muscle, bone. | Sacrum, coccyx, heels, ischium. |
| Unstageable | Obscured full-thickness skin and tissue loss (by slough or eschar). | Extent cannot be confirmed until base is visible. | Any location with significant necrotic tissue. |
| Deep Tissue Injury | Persistent, non-blanchable deep red, maroon, or purple discoloration. | Intact or non-intact skin with underlying soft tissue damage. | Heels, sacrum, areas under medical devices. |
This table serves as a starting point. A truly accurate assessment always combines what you see with a thorough hands-on evaluation of the patient and their unique circumstances, including their mobility, nutritional status, and comorbidities.
A consistent approach to staging does more than just satisfy documentation requirements; it builds a reliable data story that demonstrates quality of care, justifies interventions, and protects both the patient and the healthcare facility.
Ultimately, mastering pressure injury staging is a non-negotiable competency for any wound care clinician. It's what empowers you to intervene early, communicate clearly, and stop minor skin issues from becoming severe, life-altering wounds. Without this core skill, even the most advanced treatments might be used at the wrong time—or not at all. Accurate staging is the cornerstone upon which all effective wound management protocols are built.
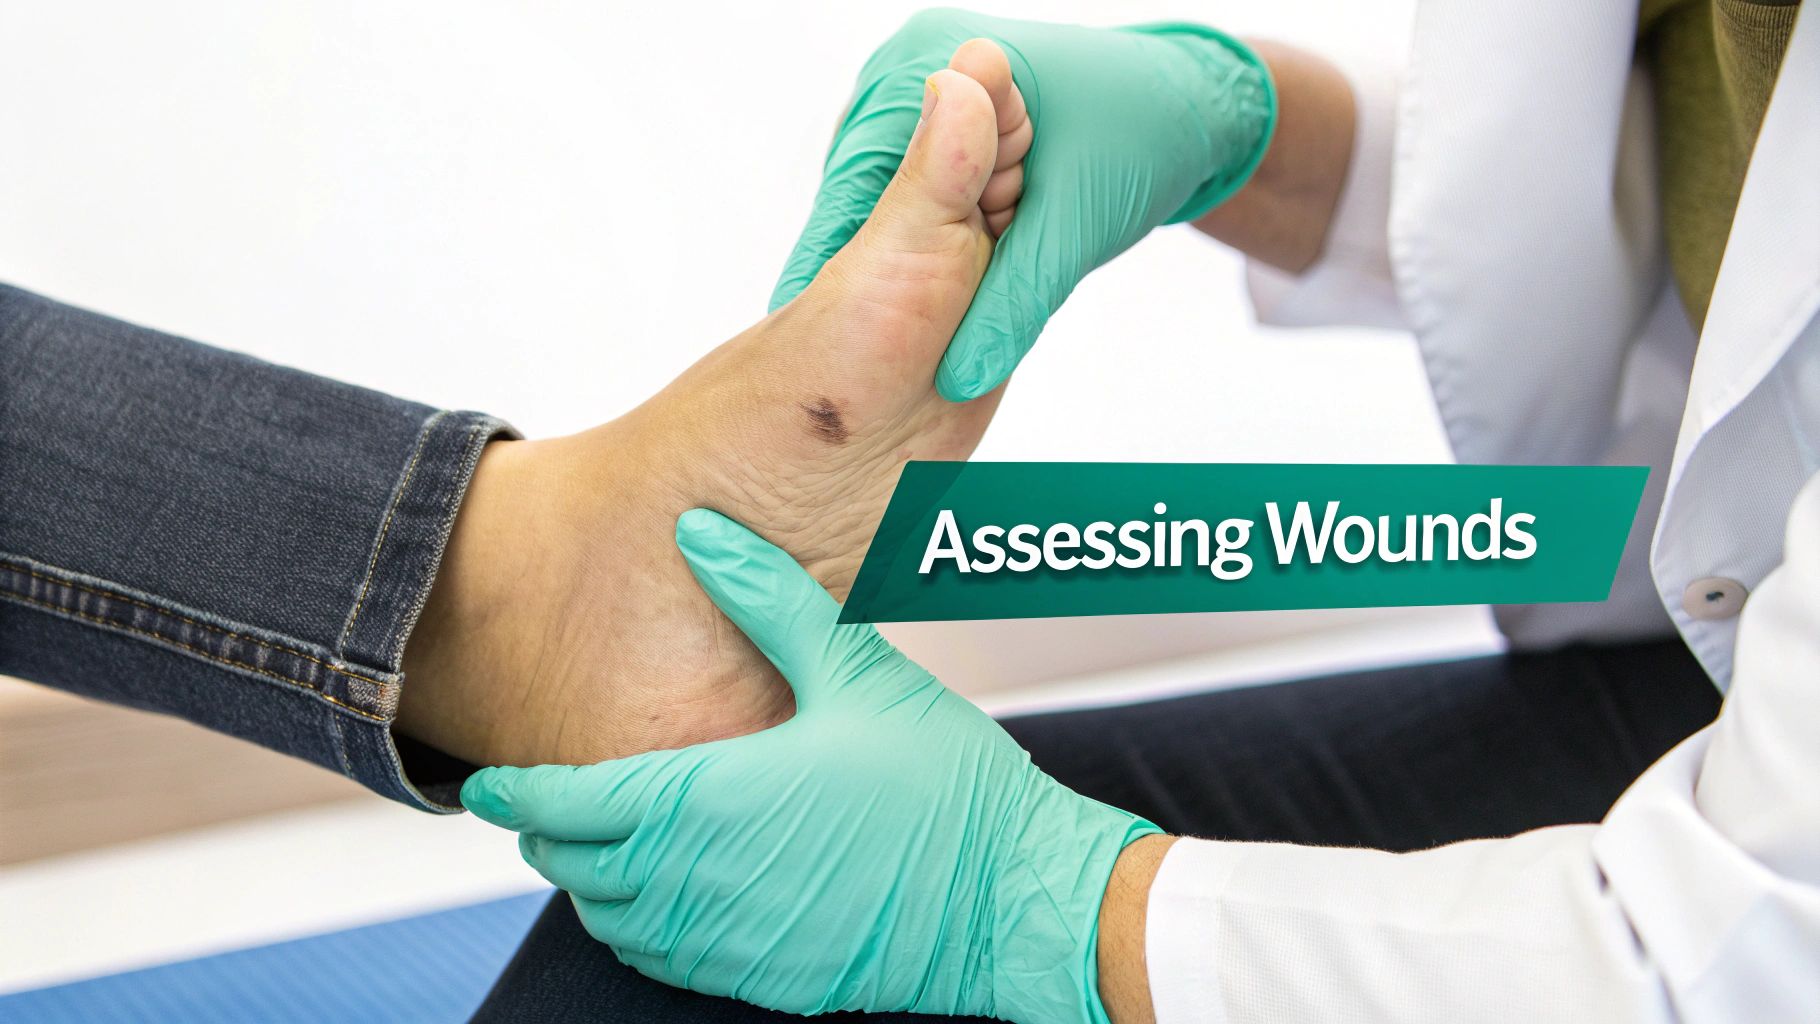
A Hands-On Guide to Assessing Each Pressure Injury Stage
Properly staging a pressure injury goes way beyond memorizing definitions from a textbook. It’s about developing sharp clinical observation skills and knowing what to look for—and what to feel for—at the bedside. Think of yourself as a detective, piecing together subtle clues that tell the real story of what's happening under the skin. A clinician's hands and eyes are the most important diagnostic tools in this process.
This section of our guide will walk you through the practical, hands-on skills you need to confidently assess and tell apart each stage, moving from theoretical knowledge to applied clinical expertise.
Stage 1 Pressure Injury: The Critical First Warning
A Stage 1 pressure injury is your very first alarm bell. It shows up as a specific area of intact skin with non-blanchable erythema. In plain English, that means you've got a patch of redness that doesn't turn white when you press on it. This is a clear signal that the tiny capillaries are struggling and blood flow is being compromised. This is an urgent call for intervention.
The classic way to check is with the blanch test. Gently press your finger on the red area for a couple of seconds, then let go. If it stays red, it’s non-blanchable. You've confirmed a Stage 1. This simple test is a crucial differentiator between transient hyperemia (which resolves) and the persistent ischemia of a pressure injury.
But relying on your eyes alone won't cut it, especially for patients with darker skin tones where redness can be incredibly hard to spot. In these cases, erythema may appear as a subtle purplish or violaceous hue.
Hands-On Assessment Tips for Stage 1:
- Feel for Temperature: The spot might feel warmer or even cooler than the skin right next to it. That temperature change is a huge clue. Warmer areas may indicate inflammation, while cooler spots can signal decreased blood flow.
- Check Tissue Consistency: The skin might feel firmer or a bit boggy (soft and almost mushy) compared to the surrounding tissue. This change in texture is a key indicator of underlying soft tissue damage.
- Just Ask: If your patient can communicate, they might tell you about pain, tenderness, or itching at that site long before you can see anything obvious. Patient-reported symptoms are valuable data points.
Stage 2 Pressure Injury: A Breach in the First Line of Defense
When you see a Stage 2 pressure injury, the skin's protective barrier has been broken. We’re now looking at a partial-thickness skin loss that involves the top layer (epidermis) and may dip into the dermis. This is an open wound, and the risk of infection has increased significantly.
Picture a blister that has popped. The wound bed is usually pink or red and moist. Sometimes it presents as an intact blister filled with clear fluid. The key here is what you don't see: no slough, no eschar, and no fatty tissue. Adipose tissue is not visible, which is a definitive line separating it from a Stage 3 injury.
It's a shallow wound, but it's a serious sign that the damage has moved past a simple circulation issue and into tangible tissue destruction. Immediate intervention is required to prevent it from progressing to a full-thickness injury.
Clinical Insight: It's easy to mix up a Stage 2 injury with Moisture-Associated Skin Damage (MASD). Remember, a Stage 2 wound usually has clean, distinct edges and is sitting over a bony spot. MASD, on the other hand, is more spread out with fuzzy borders and often appears in skin folds where moisture is trapped.
Stage 3 Pressure Injury: Damage Extends to Deeper Layers
With a Stage 3 pressure injury, the damage has gone full-thickness, right through the skin and down into the subcutaneous fat. The dead giveaway is seeing adipose (fat) tissue in the wound bed. That's how you know you're past Stage 2. Muscle, tendon, and bone are not exposed.
You'll often see granulation tissue, which has a bumpy, bright red appearance, indicating the start of the healing process. You might also spot epibole (where the wound edges roll under) and some slough or eschar. This is also where undermining and tunneling can start, creating hidden pockets of damage you can't see from the surface. These must be probed and measured.
Keep in mind that the depth of a Stage 3 can be deceiving. Over the bridge of the nose, it might be very shallow due to the lack of subcutaneous tissue. But over the sacrum, where there's more padding, it can be surprisingly deep.
Stage 4 Pressure Injury: The Most Severe Tissue Loss
A Stage 4 pressure injury is as bad as it gets. This is full-thickness skin and tissue loss where the damage is so deep you can see or physically touch fascia, muscle, tendon, ligament, cartilage, or even bone. The level of tissue destruction is profound and carries significant systemic risks for the patient.
Just like in Stage 3, you'll likely find slough, eschar, epibole, undermining, and tunneling. The moment you have exposed bone or tendon, the risk of osteomyelitis (bone infection) skyrockets. This is a critical clinical finding that often requires advanced imaging and systemic antibiotic therapy.
Getting the stage right here isn't just about treatment—it's about understanding the profound systemic impact this wound is having on your patient. For a deeper dive into treatment, check out our guide on 10 evidence-based wound dressing selection strategies.
Unstageable Pressure Injury: When the True Depth Is Hidden
An unstageable pressure injury is a full-thickness wound where you simply can't see the bottom. The wound bed is covered by so much slough or eschar that you have no idea how deep the damage goes. It is either a Stage 3 or a Stage 4, but the exact stage cannot be confirmed.
- Slough: This is the soft, stringy, non-viable stuff. It can be yellow, tan, gray, or even greenish.
- Eschar: This is the thick, dry, leathery necrotic tissue, usually dark brown or black.
Until enough of that is debrided to expose the true wound base, you can't call it a Stage 3 or 4. The one exception is stable eschar on a heel; that's the body’s natural bandage, and you should leave it alone unless there are signs of infection like fluctuance or drainage.
Suspected Deep Tissue Injury: A Looming Threat
A Suspected Deep Tissue Injury (DTI) is one of the most deceptive and dangerous presentations. It's a serious injury to the underlying tissue, but the skin on top is often intact. It shows up as a persistent, non-blanchable deep red, maroon, or purple area. Sometimes, it looks like a dark, blood-filled blister.
Think of a DTI like an iceberg. What you see on the surface is just a hint of the massive damage underneath. These injuries can go downhill fast, sometimes opening up into a massive Stage 3 or 4 wound overnight, even with the best care. The tissue might feel painful, firm, or boggy and have a different temperature than the surrounding skin. Early identification and aggressive offloading are paramount.
Mastering Wound Photography and Measurement
An accurate stage tells you where you are, but solid, consistent documentation shows you where you’re going. In wound care, a picture really is worth a thousand words—it creates an undeniable visual record of a wound's journey from one assessment to the next. High-quality photos and precise measurements are the bedrock of effective progress tracking, clear team communication, and legally defensible charting.
Think about it this way: describing a complex wound with text alone is like trying to explain a detailed painting over the phone. A clear photograph provides instant, objective context that words simply can't capture. It cuts through the guesswork and ensures everyone on the care team, from the physician to the next shift’s nurse, sees the exact same thing. This visual continuity is crucial for evaluating the effectiveness of a treatment plan.

Capturing Consistent and High-Quality Wound Images
When it comes to wound photography, consistency is king. Without it, you can't make reliable comparisons over time. To get it right, you need a standardized process for every single photo. This protocol should be a formal part of your facility's wound care policy.
Essential Photography Checklist:
- Use Good, Consistent Lighting: Shadows and glare are your enemies; they can completely distort a wound's appearance. A well-lit room is a start, but a portable, dedicated light source is far better. And never use a flash—it washes out colors and hides crucial details like subtle slough or erythema.
- Include a Measurement Tool: Always place a disposable, single-use ruler right next to the wound. This is non-negotiable. It provides an immediate sense of scale and grounds the image in objective reality. Some rulers also have color calibration bars for enhanced accuracy.
- Maintain the Same Angle and Distance: Take your photos from the same perspective every time, usually a direct, 90-degree angle from above. This prevents distortion and makes your week-to-week comparisons truly meaningful. Documenting the distance and angle can help standardize this process.
- Get the Full Context: Snap at least two pictures. The first should be a close-up of the wound with the ruler. The second should be from further away to show its location on the body, providing essential anatomical context. This helps orient anyone viewing the image.
- Ensure the Patient Is in the Same Position: Photographing a wound while a patient is lying down one week and sitting up the next can dramatically change its shape and appearance due to tissue shifts. Consistent patient positioning is key for accurate comparative analysis.
A strong photographic record is more than a clinical tool; it’s a powerful piece of evidence. It can be used to justify treatment choices, support reimbursement claims, and provide clear visuals for telehealth consultations.
Performing Accurate Wound Measurements
Once you have a great image, the next step is precise measurement. This quantitative data is critical for tracking whether a wound is healing or declining. The standard method involves measuring the wound's greatest length, greatest width, and depth. These measurements form the basis for calculating wound volume and surface area changes over time.
The easiest way to standardize this is to imagine the wound as a clock face. This simple analogy helps ensure every clinician is measuring the exact same way, regardless of who is performing the assessment.
- Measure Length: Find the longest point of the wound from head to toe (think 12 o'clock to 6 o'clock). Record this measurement in centimeters.
- Measure Width: Next, find the widest point of the wound from side to side (think 9 o'clock to 3 o'clock). This measurement should be perpendicular to the length you just took.
- Measure Depth: To measure depth, gently insert a sterile, cotton-tipped applicator into the deepest part of the wound bed. Mark the spot where the applicator is level with the surrounding skin, then measure the applicator from its tip to your mark.
Documenting Undermining and Tunneling
Some wounds have hidden depths that require a bit more investigation. Undermining and tunneling are sneaky areas of tissue loss that extend under the wound's visible edges, and you have to find them. Failure to identify and document these can lead to abscess formation and delayed healing.
Here's where the clock face analogy comes in handy again. Gently probe the wound edges with a cotton-tipped applicator to locate any of these hidden channels or cavities.
- For Undermining: Note the location and depth. For example: "Undermining noted from 2 o'clock to 5 o'clock, measuring 2.5 cm deep at its deepest point (at 3 o'clock)."
- For Tunneling: Describe the tunnel's direction and depth. For example: "A 4 cm tunnel was found at 10 o'clock, tracking toward the patient's left hip."
Mastering these documentation techniques turns your clinical notes into a clear, objective story of healing. This meticulous record is not only essential for collaborative care but also proves the value of your interventions over time, providing a robust defense against legal challenges and supporting quality improvement initiatives.
Connecting Clinical Staging to Documentation and Coding
As clinicians, we know that accurate pressure injury staging is a fundamental skill. But that hard-won clinical judgment is only as good as the documentation that backs it up. This is where your hands-on assessment collides with the tough realities of healthcare administration, billing, and quality reporting. Without clear documentation, your excellent clinical work exists in a vacuum.
Think of your chart notes as the bridge connecting what you see at the bedside to the patient’s permanent record. A vague entry like "Stage 2 on sacrum" just doesn't cut it. It’s a dead end, leaving far too much to guesswork and failing to justify the care you’re providing. Great documentation tells the full story and answers the "why" behind your assessment, painting a vivid picture for anyone who reads the chart.
Your notes need to translate everything you see, feel, and measure into objective, concrete language. This isn't just about checking a box for compliance; it's the core evidence that proves medical necessity, secures proper reimbursement, and defends your facility in an audit. Every detail matters, from wound dimensions to the percentage of different tissue types in the wound bed.
Translating Bedside Assessments into Bulletproof Charting
The goal is simple: write a note so clear that another clinician, who has never even met the patient, can perfectly visualize the wound. This means getting specific and moving beyond generic descriptions. Avoid subjective terms like "looks better" or "small amount of drainage" and replace them with objective data.
Weak documentation is subjective and lazy. Strong documentation is precise, measurable, and objective, leaving no room for doubt. It is the foundation of a legally sound medical record.
Let's look at the difference this makes in practice:
-
Stage 1 Example:
- Weak Note: "Red area on left heel."
- Strong Note: "3 cm circular area of non-blanchable erythema noted on the posterior aspect of the left heel. Surrounding skin is warm to the touch and feels firm compared to adjacent tissue. Patient reports tenderness upon palpation. Skin remains intact."
-
Stage 3 Example:
- Weak Note: "Wound on buttock."
- Strong Note: "4.5 cm x 3.2 cm x 1.8 cm Stage 3 pressure injury over the sacrum. Wound bed contains 70% granulation tissue and 30% yellow slough. Adipose tissue is visible at the base. Moderate serosanguinous drainage noted. Edges are intact with no undermining or tunneling."
See the difference? The strong notes are packed with specifics—measurements, percentages, anatomical landmarks. This level of detail eliminates ambiguity and creates a rock-solid foundation for everything that follows, including coding, billing, and quality metrics.
The Financial Impact of Precise Staging and Coding
Your clinical notes are the fuel that runs the entire revenue cycle. Every pressure injury stage is tied to a specific set of International Classification of Diseases, Tenth Revision, Clinical Modification (ICD-10-CM) codes. These codes are the language payers understand; they communicate the severity of the patient's condition, which directly drives reimbursement.
Sloppy documentation almost always leads to coding errors. A coder can't invent details—they can only code what’s explicitly written. If your note for a Stage 4 injury lacks the necessary specifics (like exposed bone or muscle), it will likely get down-coded to a lower-paying stage, resulting in a significant loss of revenue.
Accurate staging isn't just a clinical task; it's a financial imperative. The difference in reimbursement between a correctly coded Stage 4 injury and a poorly documented one can be substantial, directly impacting your organization's bottom line.
This is especially true when dealing with programs like the Hospital-Acquired Condition (HAC) Reduction Program. Rigorous documentation of injuries that are "present on admission" is your best defense against steep financial penalties. A well-documented initial assessment provides clear evidence that the facility is not responsible for the wound's origin.
Linking Staging to ICD-10-CM Codes
The ICD-10-CM system is designed for specificity, allowing you to code for both the exact anatomical site and the assessed stage. The codes are structured to capture this detail precisely, and your documentation must provide the elements needed to select the correct code.
Common ICD-10-CM Code Structure:
- Anatomical Site: The code starts by identifying the location (e.g., sacrum, heel, elbow).
- Severity/Stage: It then specifies the stage of the injury (Stage 1, 2, 3, 4, Unstageable, or DTI).
For example, take a look at the codes for a pressure injury on the sacrum. They are all distinct based on stage:
- L89.151: Pressure ulcer of sacral region, Stage 1
- L89.152: Pressure ulcer of sacral region, Stage 2
- L89.153: Pressure ulcer of sacral region, Stage 3
- L89.154: Pressure ulcer of sacral region, Stage 4
- L89.156: Pressure injury of sacral region, deep tissue injury
- L89.150: Pressure ulcer of sacral region, unstageable
To make sure your documentation fully supports the right codes, you can explore our detailed ICD-10 and CPT coding guide for wound care billing for a deeper dive. When you master this connection, your clinical expertise becomes a powerful tool that ensures your team gets credit for the high level of care you provide and optimizes financial outcomes for your organization.
Implementing a Reliable Assessment Workflow
Having a precise pressure injury staging guide is like having a detailed map. But a standardized workflow? That’s the reliable vehicle that gets your team safely to the destination of better patient outcomes. A guide is only useful if it's applied consistently by every member of the care team.
Without a consistent, step-by-step process, even your sharpest clinicians will produce varied, sometimes unreliable, results. A solid workflow is what transforms individual expertise into a predictable, team-wide system. It’s how you minimize errors, sharpen communication, and build a powerful, data-rich story of each patient's journey. It moves wound care from an art to a science.
This blueprint offers a practical framework you can plug into your daily routine. It's built to be flexible, whether you're in a bustling hospital, a focused clinic, or providing care in a home health setting. The principles of a structured assessment remain the same across all care environments.

Building Your Core Assessment Checklist
A dependable workflow is built on a clear, sequential checklist that closes the door on ambiguity. It’s your guarantee that every patient gets the same high level of scrutiny during every single encounter. Think of this structured approach as your best defense for catching early warning signs and documenting changes with laser-like precision. It ensures no critical step is missed.
Here's a sample workflow your team can adopt and make your own:
- Step 1: Initial Risk Evaluation. Every admission or new patient encounter should kick off with a validated risk assessment. The Braden Scale remains the gold standard for spotting individuals who are most vulnerable to developing pressure injuries. This score should directly inform the prevention plan.
- Step 2: Comprehensive Skin Inspection. Get the lights on and perform a thorough, head-to-toe skin check. You'll want to pay extra close attention to bony prominences—the usual suspects like the sacrum, heels, elbows, and hips, but also less obvious places like the occiput and under medical devices.
- Step 3: Visual and Palpation Check. When you find a suspicious area, zoom in. Conduct a focused assessment, noting any non-blanchable erythema, changes in temperature (either warmth or coolness), and differences in tissue consistency, like firmness or bogginess.
- Step 4: Accurate Staging. Based on what you see and feel, assign the correct pressure injury stage (1-4, Unstageable, or DTI). If you’re on the fence, don't guess—bring in a wound care specialist for a second opinion. Interdisciplinary collaboration improves accuracy.
- Step 5: Photography and Measurement. Good photos are non-negotiable. Capture high-quality, consistent images that include a ruler for scale. Measure the length, width, and depth, and be meticulous about documenting any undermining or tunneling using the clock method.
- Step 6: Detailed Documentation. Chart your findings right away, while they’re fresh. Use objective, specific language to describe the wound's characteristics: location, dimensions, tissue types, drainage, odor, and the condition of the periwound skin.
- Step 7: Schedule Follow-Up. Don’t leave the next steps to chance. Set a clear timeline for the next assessment based on the wound's severity and the patient's overall condition. High-risk wounds may require daily assessment, while stable wounds may be assessed weekly.
By standardizing these steps, you build a system that relies less on any one person's memory and more on a proven, repeatable process. That consistency is the very foundation of high-quality, defensible care.
Clinical Workflow and Quality Checklists
A great workflow isn't just a set of instructions; it includes a built-in mechanism for self-correction. Quality checks empower your team to constantly refine its process and catch small inconsistencies before they snowball into bigger problems. This fosters a culture of accountability where everyone takes ownership of patient outcomes. Regular chart audits and peer reviews are essential components.
The table below breaks down these steps into actionable checklists you can use for training and daily quality assurance.
| Workflow Step | Key Action | Quality Check Point |
|---|---|---|
| 1. Risk Evaluation | Complete the Braden Scale upon admission and at regular intervals. | Is the Braden score documented and used to inform the care plan? Is it re-evaluated with any change in patient condition? |
| 2. Skin Inspection | Perform a head-to-toe skin check in a well-lit environment. | Are we consistently inspecting all bony prominences and areas under medical devices? Is the inspection documented? |
| 3. Focused Assessment | Palpate suspicious areas for temperature and tissue consistency changes. | Does our documentation clearly justify the assigned stage with objective findings (e.g., "firm, boggy texture")? |
| 4. Staging | Assign the correct NPIAP stage based on visual and tactile evidence. | Are we consulting with specialists when a stage is difficult to determine? Are new nurses paired with experienced preceptors? |
| 5. Photography | Take consistent, well-lit photos with a visible measurement tool. | Is our lighting and camera angle consistent for every photo to show true change? Are photos being stored securely? |
| 6. Measurement | Measure length, width, and depth; probe for undermining/tunneling. | Are we consistently using the "clock face" method to describe undermining and tunneling? Are all measurements in centimeters? |
| 7. Documentation | Chart all findings using specific, objective language immediately. | Are wound assessments easily accessible to the entire interdisciplinary team in the EHR? |
| 8. Communication | Alert the care team of any changes in wound status. | Is there a clear process for notifying the team when a wound's stage changes or shows signs of infection? |
This kind of structured self-review is vital. For teams ready to take the next step, it’s worth exploring how AI-assisted workflows drive clinical excellence by automating many of these routine checks. A powerful workflow, supported by smart tools, frees you up to focus on what truly matters: your patients. These technologies can standardize measurements and tissue analysis, further reducing variability.
Common Questions About Pressure Injury Staging
Even with the best staging guides, some situations at the bedside are just plain confusing. Working through these tricky spots is what separates a good assessment from a great one. These gray areas often lead to inconsistent staging and documentation, which can impact patient care and reporting. Let's break down some of the most common questions that pop up, giving you clear, practical answers for those tough calls.
Think of this as fine-tuning your clinical instincts. We're clearing up the gray areas where mistakes happen, making sure your assessments are always confident, accurate, and defensible. Answering these questions correctly is a hallmark of an expert clinician.
How Do I Differentiate a Stage 2 Injury from Moisture Damage?
This is probably the single most common mix-up we see in wound assessment, and the implications for treatment are significant. The easiest way to tell them apart is to think about their root cause, where they show up, and what they look like. I tell my team to think of it as "crater versus rash."
- Stage 2 Pressure Injury: This is all about focused, intense pressure or friction, almost always over a bony spot. It looks like a shallow, clean crater or a blister with very distinct, well-defined edges. The damage is highly localized right at that pressure point. The cause is mechanical force.
- Moisture-Associated Skin Damage (MASD): This is from prolonged skin contact with moisture, like incontinence, sweat, or wound exudate. The damage is spread out and diffuse—more like widespread redness or irritation with blurry, irregular borders, and often satellite lesions. You'll often find it in skin folds or areas where moisture pools, not necessarily over a bone. The cause is chemical irritation.
Can a Pressure Injury Reverse Stage as It Heals?
Absolutely not. Pressure injuries should never be "reverse-staged" or "down-staged." A wound that was a Stage 4 doesn't magically become a Stage 3 just because it's filling in with new tissue. This is a critical concept in wound documentation that reflects the permanent loss of the original tissue structure. Getting the documentation right here is critical for telling the wound's true story.
It should always be documented as a "healing Stage 4 pressure injury." Why? Because the new tissue filling that hole is scar tissue. It's not the same as the original muscle or fat that was lost; it's weaker, less vascular, and functionally different. It will always be more susceptible to future breakdown. Keeping the original stage attached preserves the history of how severe the injury truly was at its worst and informs future risk assessments.
When Should I Classify a Wound as Unstageable?
You should label a wound as unstageable when the bottom of the wound bed is completely hidden from view, making a full assessment of tissue depth impossible. If you can't see the true depth of tissue loss because it's covered by more than 50% slough (the yellowish, soft stuff) or any amount of eschar (the hard, black/brown cap), you simply can't make an accurate assessment.
An unstageable wound is a full-thickness injury, but you don't know just how deep it goes. You can't tell if it's a Stage 3 or a Stage 4 until enough of that dead tissue is cleaned out (debrided) to let you see the base.
Once the wound bed is visible, you can finally assign it the correct stage (either 3 or 4). The only real exception here is that stable, dry, and intact eschar on a heel—that's the body's natural bandage, and we typically leave it alone unless signs of infection are present.
What Is the Significance of a Deep Tissue Injury?
A Deep Tissue Injury (DTI) is a huge red flag. It’s the visual cue that something terrible is happening under the surface. It shows up as a patch of intact or non-intact skin that’s a persistent, non-blanchable deep red, maroon, or even purple color. Sometimes it looks like a blood-filled blister. This discoloration is screaming that the soft tissue deep down, often at the muscle-bone interface, has been crushed by intense or prolonged pressure and shear.
The real danger of a DTI is how quickly it can fall apart. These injuries can deteriorate rapidly, suddenly opening up to reveal a massive Stage 3 or Stage 4 pressure injury, sometimes in just a matter of days. This is not a failure of care but the natural evolution of a severe, deep injury. Spotting a DTI early is your chance to get aggressive with offloading and other interventions to try and prevent the tissue from dying off completely and to manage patient and family expectations about its potential progression.
Streamline your entire wound care process with Ekagra Health AI. Our end-to-end platform uses voice-first AI to cut documentation time by up to 70%, automate coding and billing, and provide precise wound analysis—letting your team focus on patient care, not paperwork. See how you can accelerate reimbursement and improve outcomes at https://ekagrahealth.ai.
