
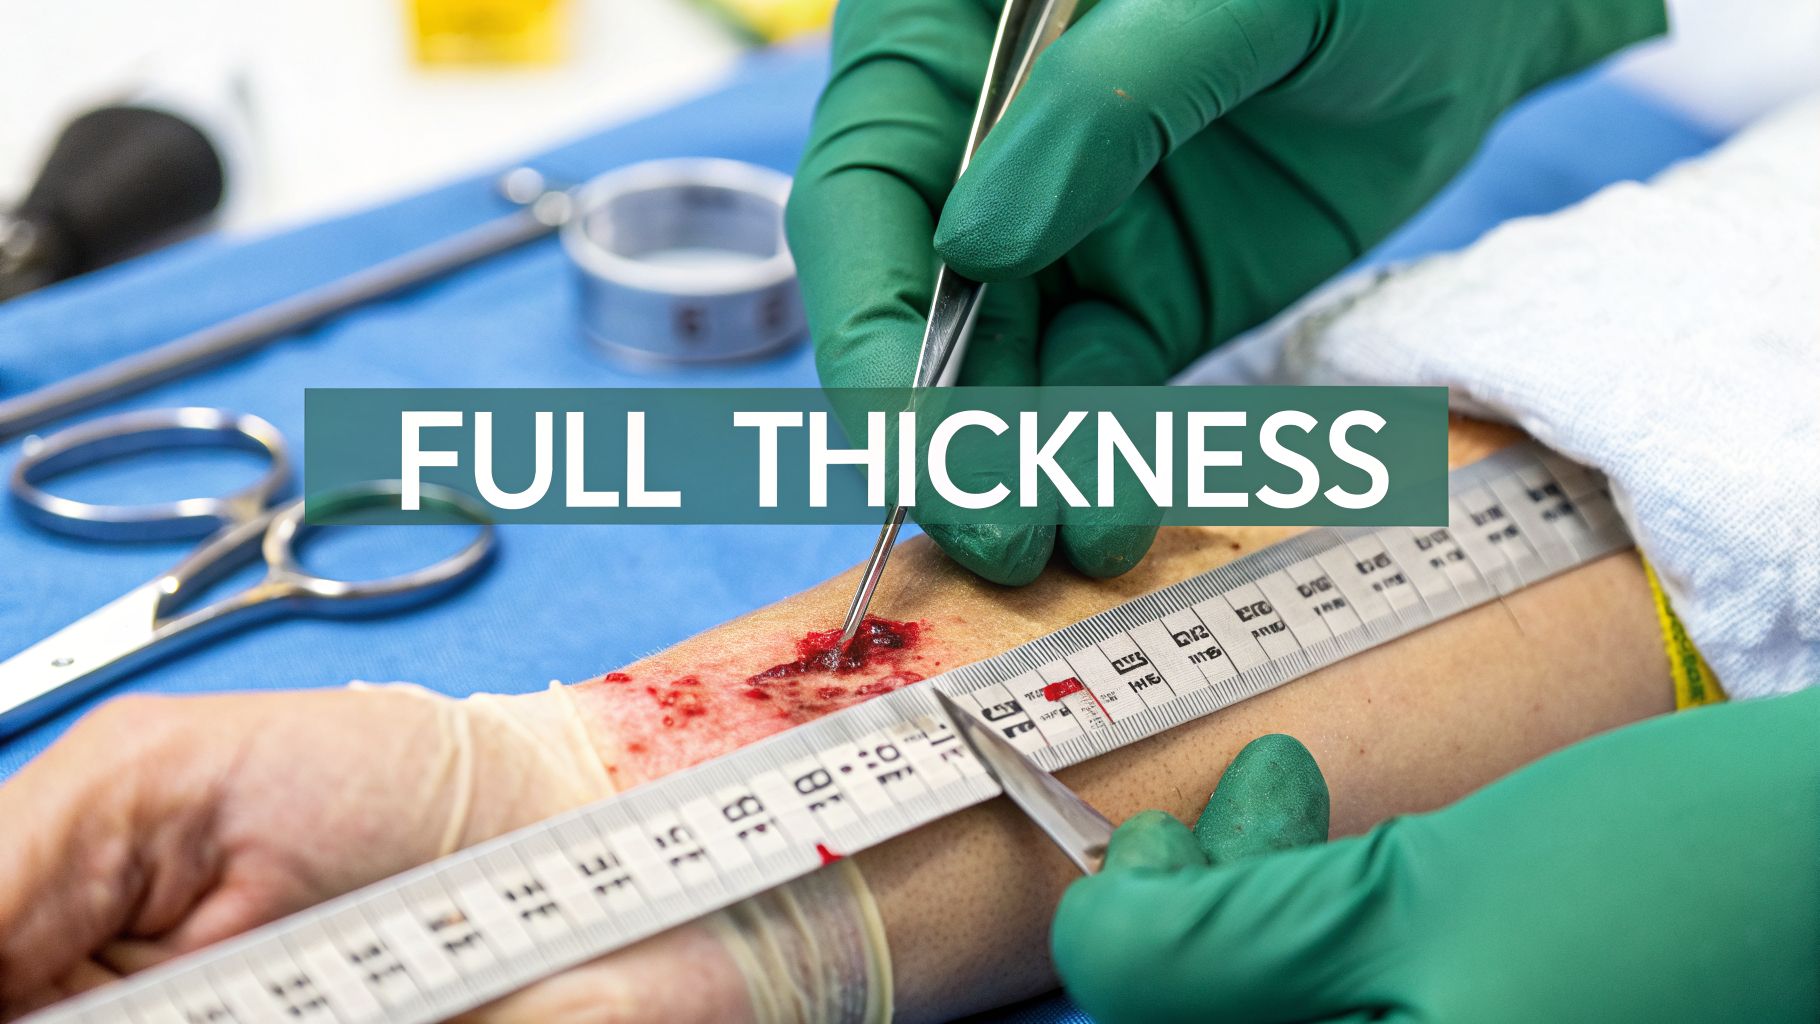
When you’re looking at an injury, the first and most critical question is always, "How deep does this go?" This isn't just an academic detail; the answer fundamentally shapes the entire treatment plan and predicts the healing journey. Understanding the difference between a partial-thickness wound and a full-thickness wound is one of the foundational concepts in clinical wound care.
Think of your skin like the layers of soil in a healthy lawn.
A partial-thickness wound is like scuffing up the turf. You've scraped off the top layer of grass (the epidermis) and maybe disturbed a bit of the dark topsoil right underneath (the dermis). The crucial thing is that the deeper root systems and seedbeds are still intact. Because those structures are there, the lawn can regenerate pretty quickly and evenly, growing back almost like it was before. For a deeper dive into these injuries, check out our guide on understanding partial-thickness wounds.

On the other hand, a full thickness wound is like someone dug a deep crater in that same lawn. It goes past the grass and topsoil, exposing the underlying clay and rock—the subcutaneous tissue, muscle, or even bone. The essential structures needed for simple regrowth are completely gone.
This complete loss of tissue is what we mean by a full thickness wound: a severe injury that extends through the epidermis and dermis and penetrates into the subcutaneous tissue layer and potentially deeper structures.
Why Depth Changes Everything
The way the body heals these two types of wounds is worlds apart.
A partial-thickness wound heals by regeneration. The remaining epithelial cells tucked inside hair follicles and sweat glands in the dermis act like little "seed packets," helping new skin sprout and spread across the surface with minimal scarring.
A full-thickness wound can't do that. It has to heal through a much more complicated and laborious process of repair. Since those deeper "seed packets" have been destroyed, the body has to build a completely new foundation from the ground up.
This repair process unfolds in distinct stages:
- Granulation: The body first fills the crater with a bumpy, bright red tissue called granulation tissue. This is the scaffolding for everything that comes next.
- Contraction: Over time, the wound edges begin to pull inward, slowly shrinking the size of the defect.
- Epithelialization: Finally, new skin cells creep in from the wound edges, migrating over the new granulation bed to close the wound.
This distinction isn't just biological—it has a staggering economic and public health impact. Chronic full-thickness wounds, like pressure injuries and diabetic foot ulcers, affect 1-2% of the population in developed countries at any given time. With diabetes cases projected to hit nearly 400 million by 2025, these numbers are only going up. In the US and UK, the cost of treating pressure ulcers alone reaches $2.1 billion and £2.1 billion annually, and a huge portion of those are deep, full-thickness injuries.
To quickly differentiate at the bedside, it helps to have a mental checklist of the key differences.
At-a-Glance Full Thickness vs Partial Thickness Wounds
Here's a table summarizing the essential clinical differences to help with rapid and accurate assessment.
| Characteristic | Partial-Thickness Wound | Full-Thickness Wound |
|---|---|---|
| Affected Layers | Epidermis and potentially the papillary layer of the dermis. | Epidermis, dermis, and extends into subcutaneous tissue (fat, muscle, tendon, or bone may be visible). |
| Appearance | Often appears red or pink, moist, and may have blistering. Similar to a bad sunburn or scrape. | Varies widely. Can be red (granulating), yellow (slough), black (eschar), or expose deep structures. |
| Sensation | Typically very painful due to exposed nerve endings in the dermis. | Can be surprisingly painless in the center due to nerve destruction, but the edges are often painful. |
| Healing Process | Regeneration. Heals from the base and edges as epithelial cells migrate from appendages. | Repair. Heals through granulation, contraction, and epithelialization. A more complex, multi-stage process. |
| Scarring | Minimal to no scarring, though some pigmentation changes may occur. | Always results in scar formation, which is less elastic and strong than the original tissue. |
| Examples | First and second-degree burns, skin tears, abrasions (road rash). | Third and fourth-degree burns, pressure injuries (Stage 3 & 4), surgical wounds, diabetic foot ulcers. |
This side-by-side view reinforces why accurate identification is paramount from the moment you first see the wound.
A full-thickness wound has lost the architectural blueprint for simple regrowth. The body must switch from a quick 'patch and paint' job to a full-scale 'demolition and reconstruction' project, which is always longer, more complex, and leaves a more significant scar.
Grasping this core difference is the first and most important step toward effective wound management. It ensures that every full-thickness wound gets the intensive, appropriate care it demands right from the very first assessment.
The Healing Journey of a Full-Thickness Wound
Healing a full-thickness wound isn't like patching a pothole; it's more like a major construction project that rebuilds a collapsed road from the foundation up. Unlike a partial-thickness wound, which can regrow skin from leftover structures, a full-thickness injury demands the body create entirely new tissue. This intricate process unfolds in four distinct, yet overlapping, phases.

Watching a deep wound progress to a closed, scarred surface is a testament to the body’s incredible repair capabilities. For clinicians, understanding each stage is crucial. It allows us to anticipate what the wound needs next, spot when healing has stalled, and guide the patient through what is often a long and challenging recovery.
Stage 1: Hemostasis and Inflammation
The process kicks off the very moment of injury. The body's first priority is hemostasis: blood vessels clamp down and platelets swarm the site, forming a clot. This does more than just stop the bleeding; the clot acts as a provisional scaffold for the repair cells that are on their way.
Right on the heels of hemostasis comes the inflammatory phase. Think of this as the body’s emergency cleanup crew. Neutrophils, followed by macrophages, rush in to fight off bacteria and clear out dead cells and other debris. This phase brings the classic signs of inflammation—redness, swelling, heat, and pain—and it's absolutely vital for prepping the wound bed for new construction. A wound stuck in this phase is a wound that won't heal.
Healing a full-thickness wound is like rebuilding a house after a fire. First, you must stop the emergency (hemostasis). Then, you bring in a demolition crew to clear out all the burned debris and unsafe structures (inflammation) before you can even think about laying a new foundation.
Stage 2: Proliferation
Once the site is clean, the rebuilding phase, or proliferation, can truly begin. This is where the magic happens, driven by three key activities that occur at the same time:
- Granulation: The body begins filling the wound’s crater with a lumpy, bright red tissue called granulation tissue. This is the new foundation, packed with collagen, fibroblasts, and brand-new blood vessels.
- Angiogenesis: Speaking of blood vessels, tiny new capillaries sprout and grow into the granulation tissue in a process called angiogenesis. This new vascular network is the supply line, delivering the oxygen and nutrients needed to fuel the intense work of repair.
- Epithelialization: While the base of the wound is filling in, epithelial cells at the wound's edge start to migrate inward. They literally crawl across the new granulation bed to eventually cover the surface and close the gap.
This is the stage where you can physically see the wound shrinking and filling in. It’s a period of intense cellular activity, but it’s also fragile. Healing can be easily derailed by infection, poor nutrition, or inadequate blood flow.
Stage 3: Maturation and Remodeling
The final stage is maturation, also known as remodeling. This phase can last for a year or even longer, well after the wound appears closed from the outside. During this time, the jumbled, disorganized collagen that was laid down quickly during proliferation is slowly replaced with a stronger, more organized type.
This remodeling process dramatically increases the tensile strength of the new scar tissue. It's important to set patient expectations, however. Repaired tissue will never be as strong as the original skin; it typically regains only about 80% of its original strength. The scar also changes over time, gradually fading from a prominent red to a paler, less noticeable color.
Understanding this journey is particularly vital given the scale of the problem. Full-thickness wounds are a massive global health challenge, especially in conditions like diabetic foot ulcers (DFUs). The annual global incidence of foot ulcers is estimated to be between 9.1 to 26.1 million cases, with some recent analyses suggesting this number could be as high as 40-60 million people each year. Read the full research about these global wound care statistics to grasp the scope of the issue.
How to Perform a Comprehensive Wound Assessment
Treating a full-thickness wound effectively starts with a rock-solid assessment. This isn't just a quick look; it's a systematic investigation that turns subjective observations into hard, objective data. When you master this process, you lay the groundwork for an evidence-based care plan that actually helps the patient heal.
Think of yourself as a detective at the scene. Your job is to meticulously gather clues from the wound bed, its edges, and the surrounding skin. Every piece of information helps you build a story of the wound's history, its current status, and what it needs to finally close.
This process demands more than a ruler and a good eye. It requires a consistent method to ensure you don't miss a thing and can reliably track progress week after week.

Measuring the Wound Dimensions
The most basic—and most critical—first step is getting the size right. Traditionally, this means grabbing a sterile, disposable ruler to capture the core dimensions.
- Length: Measure the longest distance from one wound edge to the other, typically head-to-toe.
- Width: Find the widest point that runs perpendicular to the length, or side-to-side.
- Depth: Gently insert a sterile, cotton-tipped applicator into the deepest part of the wound. Pinch the applicator where it meets the skin, pull it out, and measure that length against your ruler.
But these numbers only tell part of the story. Full-thickness wounds are notorious for hiding damage beneath the surface.
- Undermining: This is when tissue under the wound edge erodes away, creating a hidden ledge or shelf. To measure it, gently sweep a cotton-tipped applicator under the wound edge, noting how far it goes.
- Tunneling: This is a narrow channel or passageway that shoots off from the main wound into deeper tissue. You measure it just like depth, carefully inserting an applicator to find its endpoint.
Identifying Tissue Types
The color and texture of the wound bed are a direct window into the healing process and any roadblocks. It’s common for a single full-thickness wound to look like a patchwork of different tissue types.
A wound bed is a living landscape. Identifying the terrain—whether it's healthy, new growth or dead, obstructive tissue—is essential for planning the next steps in care, from dressing selection to the need for debridement.
You need to be able to confidently spot:
- Granulation Tissue: This is the good stuff—healthy, new tissue. It looks beefy red or bright pink, with a bumpy or granular texture that indicates good blood flow and active rebuilding.
- Slough: This non-viable tissue is usually yellow, tan, or white and often has a stringy, wet appearance. Slough is a breeding ground for bacteria and has to go.
- Eschar: This is dead tissue that's thick, hard, and leathery, appearing black or brown. Eschar is like a cap over the wound, completely blocking it from healing.
Characterizing Wound Exudate and Edges
The fluid coming from the wound, or exudate, provides even more clues. You’ll need to note its amount (scant, moderate, heavy), color (clear, cloudy, bloody, green), and consistency (thin, thick). A sudden change in exudate, especially if it develops a foul odor, is a huge red flag for infection.
Finally, look closely at the wound edges and the surrounding (periwound) skin. Are the edges attached and crawling inward, or are they rolled under (epibole), a sign that healing has stalled? Is the periwound skin healthy, or is it red, mushy from moisture (macerated), or hard and firm (indurated)?
The Shift to Digital Precision
While manual measurements are the foundation of wound care, they can be surprisingly inconsistent. One clinician might measure a wound slightly differently than the next, making it tough to know if the wound is truly getting better or worse. This is where technology is making a huge difference.
AI-powered digital wound analysis tools use the camera on a smartphone or tablet to capture images and automatically calculate precise measurements. These systems can digitally trace the wound’s perimeter, calculate the exact surface area, and even help classify tissue types with much greater objectivity. This takes the guesswork out of the equation and creates a reliable, visual record of the wound’s journey over time. For a deeper dive into how technology is changing this process, you can explore this overview of different wound assessment tools for nurses.
Whether you’re using a ruler or a tablet, a comprehensive assessment provides the blueprint for your care plan. It’s the foundation that every single treatment decision is built on.
To help standardize this process at the bedside, here is a practical checklist you can follow. It integrates both traditional and modern digital documentation practices.
Table: Bedside Full Thickness Wound Assessment Checklist
| Assessment Area | Key Observation Points | Digital Documentation Tip (Using AI Tools) |
|---|---|---|
| Location & Etiology | Anatomical site, suspected cause (pressure, venous, arterial, etc.). | Use dropdown menus or AI-suggested etiology based on wound characteristics. |
| Dimensions | Measure length, width, and depth in centimeters. | Capture a high-quality image; allow the AI to auto-calculate surface area and volume. |
| Undermining/Tunneling | Probe for hidden tracts or shelves; document location (using clock face) and depth. | Use the digital annotation feature to draw arrows or circles on the image, labeling the exact location and depth. |
| Wound Bed Tissue | Identify percentages of granulation, slough, and eschar. Note exposed structures (bone, tendon). | Let the AI software assist in tissue type classification and percentage calculation for consistency. |
| Exudate | Describe amount (scant, moderate, copious), color, consistency, and odor. | Select standardized descriptors from a predefined list to ensure consistent terminology across all charts. |
| Wound Edges | Note if edges are attached, detached, rolled (epibole), or fibrotic. | Zoom in on the high-resolution image to clearly visualize and annotate the edge characteristics. |
| Periwound Skin | Assess for maceration, erythema, induration, edema, or signs of infection. | Capture a wider-angle photo to include at least 4 cm of periwound skin. Annotate areas of concern directly. |
| Pain Level | Ask the patient to rate their pain on a 1-10 scale, both at rest and during dressing changes. | Log the pain score directly into the digital record, which can then be tracked and graphed over time. |
By systematically working through these points, you ensure no critical detail is overlooked, leading to more accurate documentation and, ultimately, better patient outcomes.
Choosing the Right Treatment and Dressing
Once you have a solid assessment of a full-thickness wound, you've got your blueprint. The treatment plan is where you start building. Managing these wounds effectively isn't about grabbing the most expensive or advanced product off the shelf; it's about making the right clinical decision for that specific wound, at that specific time. The strategy always comes back to a few core principles: preparing the wound bed, managing moisture, and keeping infection at bay.
Think of a dirty wound bed like a garden plot choked with weeds and rocks. Before you can expect healthy new growth (granulation tissue), you have to clear the ground. That’s precisely what debridement does—it’s the essential first step of removing non-viable tissue like slough and eschar. If you leave that dead tissue behind, you're essentially putting a "closed for business" sign on the wound, stalling healing and inviting bacteria to move in.

Preparing the Wound Bed with Debridement
Debridement isn't a one-shot deal, and there are several ways to get the job done. The method you choose really depends on the wound's condition, your patient's overall health, and the clinical setting you're in.
- Surgical Debridement: This is the fastest and most aggressive approach, using a scalpel to remove large amounts of necrotic tissue in a single session. It's typically done in an operating room and reserved for extensive, deep, or severely infected wounds.
- Sharp Debridement: This is a more controlled method performed at the bedside. Using sterile instruments, a trained clinician can selectively remove devitalized tissue. It takes real skill and a steady hand.
- Enzymatic Debridement: For this method, you apply a prescribed ointment that contains special enzymes. These enzymes work over time to break down and dissolve necrotic tissue without harming healthy tissue.
- Autolytic Debridement: Here, you're essentially helping the body do its own work. By applying a moisture-retentive dressing, you create the perfect environment for the body’s own enzymes to liquefy and separate slough and eschar. It's by far the gentlest method, but it's also the slowest.
After clearing the way, the focus shifts to creating the ideal environment for new tissue to grow. And that is all about moisture.
The goal of modern wound care is to achieve moisture balance. A wound that is too dry will desiccate and healing will stop. A wound that is too wet will macerate the surrounding skin and invite infection. The "Goldilocks principle" applies: it must be just right.
Selecting the Optimal Dressing
The dressing you choose should be a direct response to what you see in the wound bed. You have to match the product's function to the wound's immediate needs, especially when it comes to exudate.
For Wounds with Heavy Exudate:
Your number one job is absorption. You need something that can wick away all that excess moisture to keep the surrounding skin from breaking down (maceration).
- Alginates: Made from seaweed, these dressings are incredibly absorbent and form a soft gel as they soak up fluid. They’re fantastic for packing deep, draining wounds.
- Foams: These soft, multi-layered dressings are workhorses for absorption and also provide great cushioning. Many come with an adhesive border, making them easy to secure.
For Wounds with Minimal Exudate or a Dry Bed:
In this case, you need to do the opposite—donate moisture to keep the wound from drying out. A dry wound bed is a dead end for migrating cells, which effectively stops the healing process in its tracks.
- Hydrogels: Available as sheets or amorphous gels, these dressings are mostly water. They are perfect for rehydrating a dry, eschar-covered wound bed and promoting autolytic debridement.
- Hydrocolloids: These create a wonderfully moist environment and are great for supporting the body's natural debridement process. They work best on wounds with light to moderate drainage.
Advanced Therapies for Complex Wounds
Sometimes, even with meticulous debridement and the perfect dressing, a full-thickness wound can get stuck. For these deep, complex wounds that just aren't progressing, it's time to bring in more advanced therapies.
One of the most effective tools in our arsenal is Negative Pressure Wound Therapy (NPWT). This involves applying a specialized foam dressing over the wound, sealing it, and using a machine to create a gentle, continuous vacuum. NPWT is a game-changer because it:
- Pulls out excess fluid and infectious material.
- Stimulates blood flow to the wound bed.
- Promotes the growth of healthy granulation tissue.
- Helps physically pull the wound edges closer together.
This therapy can make all the difference for large, deep wounds, like dehisced surgical sites or major traumatic injuries. By translating a sharp assessment into a targeted treatment plan—from debridement and dressings to advanced therapies—we can actively guide even the most challenging full-thickness wounds through the healing cascade and on to a successful closure.
Navigating Complications and Setting Realistic Expectations
Even when you’ve done everything right, healing a full-thickness wound is rarely a straight shot. These deep injuries are prone to setbacks, and the key to keeping things on track is catching the early warning signs of trouble. A sharp eye allows you to step in before a small problem becomes a major detour.
One of the first hurdles is learning to tell the difference between a wound that’s simply contaminated versus one that’s critically colonized or outright infected. It’s a subtle distinction, but a critical one. While every chronic wound has bacteria hanging around, critical colonization is that tipping point where the bacterial burden is just high enough to slam the brakes on healing, often without the classic, textbook signs of infection.
You might just notice a few subtle clues: granulation tissue that looks a bit dusky or pale, a healing process that has flatlined, or maybe a new, faintly sweet smell. A full-blown infection, on the other hand, is usually much less subtle. It screams for attention with tell-tale signs like increasing pain, spreading redness (erythema), warmth, pus, and a genuinely foul odor.
Spotting Common Roadblocks to Healing
Beyond infection, a few other common issues can derail recovery. Knowing what to look for helps with both prevention and quick intervention. A full-thickness wound that has stalled or started to go backward is often waving a red flag, signaling a deeper problem that needs to be sorted out before healing can get back on course.
Keep these key complications on your radar:
- Osteomyelitis: This bone infection is a serious risk anytime a full-thickness wound exposes bone or sits near a bony landmark. It’s a tough fight, often demanding long-term antibiotics and surgical debridement.
- Stalled Healing (Chronic Inflammation): Sometimes, a wound just gets "stuck" in the inflammatory phase and refuses to move on. This usually points to a persistent problem like repetitive pressure, poor circulation, or an unmanaged systemic illness.
- Epibole: This is what happens when the wound edges curl under and thicken up. Once those edges roll, the migrating epithelial cells hit a dead end and can no longer crawl across the wound bed, effectively blocking the path to closure.
The Body-Wide Impact on a Local Wound
It’s easy to get tunnel vision, but you have to remember that a wound doesn't exist on an island. It's intimately connected to the patient's entire body, and systemic problems are often the real culprits behind a non-healing wound. For instance, poorly controlled diabetes wreaks havoc on the immune system and circulation, essentially starving the wound of the oxygen and nutrients it desperately needs to rebuild.
Think of the wound bed as a window into the patient's overall health. You'll never get that wound healed by just treating it locally if you don't also tackle the systemic issues undermining the body's ability to do its job.
This big-picture view is especially crucial when dealing with pressure injuries. Decubitus ulcers, which frequently become full-thickness, have seen a disturbing rise worldwide, with total cases jumping from just over 300,000 in 1990 to nearly 646,000 in 2021. In the United States alone, these wounds drain $2.1 billion from the healthcare system every year, highlighting the immense financial and human cost of what are often preventable injuries. Learn more about the global burden of pressure injuries.
By anticipating these challenges, you can give patients and their families a realistic prognosis and manage their expectations. Explaining that healing is a journey, not a race, and that bumps in the road are possible, prepares them for what’s ahead. It also reinforces how vital their role is in managing nutrition, offloading pressure, and keeping their other health conditions in check. Knowing when to call in a specialist isn’t a sign of failure—it’s the mark of a smart, proactive clinician who puts their patient first.
Nailing Your Documentation for Coding and Reimbursement
Top-tier clinical care for a full-thickness wound is fantastic, but it's only half the battle. If your documentation isn't just as meticulous as your treatment plan, your practice's financial health is at risk. Think of your documentation as the crucial bridge connecting your hard work at the bedside to successful reimbursement.
Your notes tell a story to the payer. That story needs to be compelling, leaving no doubt that the services you provided were medically necessary. Without that clear narrative, even the most effective treatments can lead to denied claims, which means administrative nightmares and lost revenue.
The Bedrock of Medical Necessity
Proving medical necessity for treating a full-thickness wound comes down to a few critical documentation habits. Your notes need to paint a crystal-clear picture of the wound's severity and the patient's overall condition, leaving zero room for interpretation.
This goes way beyond just listing the wound's dimensions. You have to get into the nitty-gritty details that justify your clinical decisions.
- Tissue Types: Don't just say "mixed tissue." Document the specific percentages of granulation, slough, and eschar. The presence of non-viable tissue is the number one reason debridement gets approved.
- Exudate Levels: Describe the amount and type of drainage with precision. Is it serous? Sanguineous? Purulent? This detail directly supports your choice of advanced absorptive dressings and the need for frequent dressing changes.
- Patient Response: Is the treatment working? Note whether the wound is improving, stalled, or declining. A documented lack of progress is your justification for escalating care to more advanced therapies.
Great documentation isn't just about getting paid. It's a fundamental part of clinical communication that proves you're delivering thoughtful, evidence-based care. It protects your practice, justifies your actions, and ultimately, supports better patient outcomes.
Connecting Your Notes to Billing Codes
Once your clinical story is locked in, you have to translate it into the language of billing—ICD-10 and CPT codes. Getting the coding right is the key to preventing denials and making sure you're paid appropriately for the complex work you do.
ICD-10 codes explain the "why" of the visit. They nail down the diagnosis, like a Stage 4 pressure injury on the sacrum or a diabetic foot ulcer with an exposed tendon. Be specific. A vague code for an "unspecified ulcer" is a red flag for payers, while a code detailing the exact location, laterality, and severity sails right through.
CPT codes, on the other hand, describe the "what"—the procedures you performed. This could be wound debridement, applying a skin substitute, or starting Negative Pressure Wound Therapy. Your documentation must perfectly mirror the CPT codes you bill. If you bill for selective debridement, your note had better describe the instruments you used and the exact slough or eschar you removed.
Speeding Up the Workflow with Modern Tools
Let's be real: creating this level of detailed documentation by hand is a slog. It’s time-consuming and ripe for human error. This is where modern, AI-powered platforms can be a game-changer, helping to smooth out the entire process from the exam room to the billing department.
This screenshot shows how AI can fit into the clinical workflow, capturing the key data points that flow directly into documentation and coding.
These systems can automatically capture precise wound measurements and help classify tissue types, building a structured, objective record on the fly. By pulling all this clinical data together, the platform can then help generate comprehensive notes and even suggest the right ICD-10 and CPT codes, slashing the administrative burden. If you're looking to tighten up your process, starting with a well-designed wound care documentation template can be a huge first step.
This kind of tech-assisted approach cuts down on coding mistakes, reduces claim denials, and gets you paid faster. Ultimately, it frees up your clinical team to focus on what they do best: taking care of patients.
Answering Your Questions About Full-Thickness Wounds
Even for seasoned clinicians, managing a full-thickness wound can bring up specific questions in the thick of daily practice. Let's tackle some of the most common queries with clear, practical answers to help you navigate those nuanced challenges at the bedside.
How Often Should I Change the Dressing?
There’s no magic number here—it all comes down to the wound itself and the type of dressing you're using. A wound that's draining heavily might need a fresh dressing every day to keep the surrounding skin from getting soggy and breaking down.
On the other hand, many modern dressings are built to last for several days, creating an undisturbed environment that a fragile wound bed needs to heal. The golden rule is simple: change the dressing before it soaks through. This keeps the wound bed perfectly moist and locks out potential contaminants.
Can a Full-Thickness Wound Heal Without Stitches?
Absolutely. Many of these wounds heal from the inside out in a process we call healing by secondary intention. The wound gradually fills up with new, bumpy granulation tissue, and the skin edges slowly creep in from the sides until they meet.
But this is the scenic route, not the highway. It’s a much slower process and usually leaves a more noticeable scar. For a large, clean wound, stitching it up (primary intention) is almost always the better option. It speeds up healing, slashes the risk of infection, and gives a much cleaner cosmetic result. Deciding which path to take really depends on the wound's size, where it is, and how clean it is.
What's the Biggest Mistake to Avoid?
One of the most damaging mistakes you can make is getting the initial assessment wrong. If you misclassify a deep, full-thickness wound as a simple partial-thickness one, every decision that follows will be flawed. You might, for instance, put on a film dressing that’s completely overwhelmed by the wound's depth and drainage.
Accurate assessment isn't just a box to check—it's the bedrock of your entire treatment plan. Getting the depth and tissue type wrong from the get-go can stall healing and open the door to serious complications.
When Should I Worry About a Wound That Isn't Healing?
It's time to be concerned if a wound isn't showing any positive signs of healing—like getting smaller or developing that healthy, pink granulation tissue—within two to four weeks of proper care.
You also need to watch for red flags that demand an immediate second look. These include a sudden spike in pain, any new or foul smells, a change in the wound drainage, or redness spreading around the wound. These are often signals of a deeper issue, like an infection, poor blood flow, or an underlying health problem that needs to be managed.
At Ekagra Health AI, we help turn complex wound care documentation into a simple, data-driven workflow. Our AI platform helps clinicians cut their documentation time by up to 70%, automates coding, and speeds up reimbursement. This frees you up to focus on what you do best: caring for your patients. See how our "voice to claim" solution can help your practice at https://ekagrahealth.ai.
